The Easiest Homemade Bread in the World

I was watching an old episode of Alton Brown’s show Good Eats awhile back and it was all about baking with your barbeque.  He made three different breads with nothing more than a dutch oven and a charcoal grill.  He didn’t even use a grill-it was a metal surface he threw hot briquettes on and put the dutch oven directly on the coals.  It was like watching MacGyver bake.  Thankfully, he did have instructions for using a traditional oven.  I have nothing against charcoal, but I love the smell of baking bread filling the house not the backyard.

102_2755

Alton’s recipe for Knead-Not Sourdough is just 4 ingredients-flour, yeast, and water.  Take 17.5 ounces of flour, 1/4 teaspoon yeast, 2 1/2 teaspoons kosher salt, and 12 ounces of water and mix in a bowl until no flour streaks remain.  Cover the bowl with plastic wrap and let sit for 19 hours.  Take the dough out of the bowl and punch down and turn it over onto itself couple times.  Cover with a towel and let rest for 15 min.  Shape into a ball and let sit (under the towel) for 2-3 hours or until it’s doubled in size.  Meanwhile, heat a dutch oven in a 450 degree oven for at least an hour.  When the dough ball has doubled, carefully place it into the pre-heated dutch oven, cover and let bake for 30 min.  After 30 min, uncover and bake until internal temperature is 210-212 degrees.  Allow to cool on a cooling rack for at least 15 minutes before serving.

I have made this recipe several times and it is delicious!  Even with just the two of us we eat the whole loaf within a day.  It has a crisp crust, with a chewy crumb inside-just the way I like it.  It’s best still warm and tastes yummy without any toppings but is best with a thin layer of butter melted into its nooks and crannies.

100_2445

The hardest part of this recipe in my house is finding a room that stays above 70 degrees overnight in the winter months.  It usually sits on my desk in my bedroom all night, and I do love that fresh bread (aka: yeast) smell first thing in the morning.

Some people think bread-making is a mysterious art that only experienced bakers can do successfully or that a home cook needs a bread machine to make good bread, but really yeast and time does all the work for you in this recipe and anyone could make this bread.  If you don’t have a dutch oven, you can shape the dough into 2 loaves and bake in a loaf pan just as easily.  Or if you didn’t have a loaf pan, either, an inverted baking sheet works as an improvised baking stone.  Pre-heat as you would the dutch oven and bake the free-form loaf on parchment paper on top of the inverted baking sheet.  If the shape comes out a little funny, just call it artisanal bread.  😉  Whatever it looks like, homemade bread tastes far superior and is much cheaper than any store-bought bread!

FoodSaver Fun


My usual Sunday morning routine is to turn the TV to QVC as I make a late breakfast of pancakes and eggs or pan-fried sliced potatoes and a fried egg (as long as there’s tons of carbs!).  From 9am-12pm here on the west coast In the Kitchen with David is on and I enjoy watching him pitch the countless kitchen gadgets I don’t know how I lived this long without owning.  I am not always immune to David Venable’s selling powers, however, and that was evident a few weeks ago when he had this FoodSaver on.

DSCN0822

But wait! There’s more! It came with 2 rolls of customizable bags, 2 wine stoppers, quart bags, and gallon bags!  Now on EasyPay with free shipping!  The feature that pushed it over the edge was the fact that I’ve never seen it in red before (and my kitchen appliances are mostly red) and I’ve coveted one of these for at least a year.  It also has a vacuum hose attachment that for $10 at Bi-Mart I bought a jar sealer attachment so I can vacuum pack mason jars.  Brilliant!

DSCN0833

One of my biggest kitchen peeves is that I never seem to go through lettuce fast enough before it turns to gelatinous goo.  We do eat salads fairly often, but I’m often undone by my desire to get a good deal and buy the larger amount because it’s a better value, so the greens often decompose faster than our consumption rate.  However, just like the FoodSaver commercials say, “air is the enemy of freshness” and what better way to prolong the life of lettuce than by vacuum packing?

DSCN0825

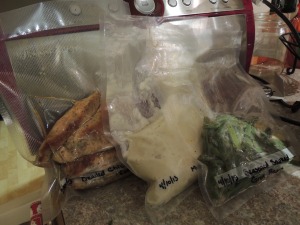
The arrival of the FoodSaver came at a great time, too.  My aunt and uncle moved from out-of-state to about an hour away from me and just 2 weeks later my aunt broke her ankle.  She broke both lower leg bones, requiring 2 surgeries and will have to be off of it for almost 6 months.  I decided to help the best way I knew how, by cooking.  I made some dinners-baked ziti, chicken divan, shepherd’s pie, vegetable beef stew, chicken cutlets, mashed potatoes, green beans, and a rhubarb pudding cake-and sealed everything up with the FoodSaver and froze them all down.

DSCN0829DSCN0824I bought the foil containers at the dollar store, which came with lids and 3 or 4 to a package.  The FoodSaver couldn’t be more simple to use.  It comes ready to go right out of the box, all I had to do was plug it in.  The quart and gallon bags just slipped into the bag feed and the FoodSaver automatically vacuum-packed the bag and sealed the end.  It took me longer to find a sharpie to write on the bags than it did to vacuum and seal them all up!  The jar sealer attachment was equally simple.  The instructions say to leave a 1″ headspace, place the jar attachment over the lid and attach the hose.  Press a button and it sucks all the air out of the jar, sealing the lid.  So far, my lettuce greens have been vacuum-packed for 8 days and are still good-no lettuce goo in sight.  I take a sealed jar of greens to work and another container of toppings and have an instant salad for lunch.

I can tell this handy little machine is going to be put to the test when the garden starts producing in earnest!  The FoodSaver was by far the best purchase David Venable has persuaded me to buy!


Home Canned Dried Beans

I used to think beans were gross.  I refused to eat chili or any soup or stew featuring any sort of bean and would only eat them if they were thoroughly disguised in a dish like in a Mexican filling.  In high school, I worked at a Taco Bell and would never eat even their refried beans (I also wouldn’t eat their meat after I started working there, too, but for different reasons).  However, like mushrooms, I found out that I do like them.  I like to think my palate is becoming more sophisticated but I have a feeling it has more to do with the fact that my mom didn’t like beans and so growing up we just didn’t eat them.  Ever.  She didn’t like Mexican food, either, so even refried beans were a culinary mystery.  In fact, Taco Bell was my first introduction to cooking beans, if you call mixing scalding hot water with dehydrated beans cooking.  It took about 2 years of working there to get up the courage to eat the refried beans-in a 7-layer burrito, easy beans, extra rice, no guacamole.  Not bad, but I couldn’t see making them at home.

I must confess that even now, bean-based soups and stews are not in my cooking repertoire but beans do make it on the menu.  One of my favorite places to go for lunch at work is to the local Mexican fast food (not Taco Bell) and eat their bean and cheese burrito.  They have the best beans, tortillas, and spicy red sauce-it comes with a handful of chips and a drink and the best part the whole things is only $4.  I love good food at even better prices.

Most of the time, however, I have homemade enchiladas in my freezer that I take to work with me and just re-heat for lunch.  I was first introduced to these enchiladas by my husband when we were still dating.  The first meal he served me was an enchilada that his father (who is a great cook) had made.  I thought they were a frozen dinner of some kind and was astonished that something so good could be made at home, froze, re-heated and still taste so good!  I got his dad to show me how to make the enchiladas myself (although mine don’t taste quite as good as his) and now I make up 2 dozen at a time to have on hand for a quick lunch.  All that burrito-folding experience at Taco Bell is finally paying off!

So what does all this have to do with canning?  This is a canning blog after all.  Well, I’ll tell you.  Commercially canned beans have a lot of salt in them (I know, because a kidney-friendly diet also means a low-salt diet).  There are low-salt versions, but my thrifty nature loathes the thought of spending almost a dollar per can of beans, when I buy dried beans in bulk for way less than a dollar per pound.  However, beans take a long time to cook and I’ve found are best only after an overnight soak.  This requires advanced planning, which I am usually incapable of on a weeknight.  If I can cooked beans myself, I’ll have beans on hand at a moments notice and for a fraction of the price of the commercially canned stuff without all that pesky salt.

Canned Turtle (Black) Beans

1 Pound Dried Beans (any type of  dried bean)

4 Quarts Water

3 Tbsp Salt (optional)

The night before you plan on canning them, dissolve 3 tbsp of salt per gallon of water for every pound of beans.  Add beans and soak at room temperature for 18-24 hours.  The brine is to make the bean skins more porous and the insides of the beans will have a creamier texture, but a salt-less soak will work, too.  The next day, drain and rinse the beans (the overnight soak will also help get rid of some of the gasiness that beans are prone to produce).  Put beans in large stock pot and cover with 2″ of water.

Boil for 30 minutes.  While they’re boiling away, get the pressure canner going and sterilize jars (I used pint jars to approximate a can of beans, but use whatever size fits your needs).  Simmer lids and rings in a separate pot.  When beans are done, fill jars with beans and cooking water, leaving 1″ headspace (I needed a little extra hot water to fill jars as I had a bit of a boil-over).  I put on the lids and rings when the jars were filled and rims wiped, then placed in the pressure canner and processed for 75 minutes (for pints-90 minutes for quarts) at 10 pounds pressure.

DSCN0659

Voila!  Cooked beans ready to go whenever I am!

DSCN0662