Lifetime Garden Goal Achieved: Greenhouse

Thanks to the relatively temperate Pacific Northwest winters, gardening year-round is possible, but is made a lot easier and more rewarding with the right tools, like a greenhouse.  Like most long-time Oregon residents, I don’t own an umbrella and couldn’t use one while gardening anyway.  I’m not a big fan of digging through mud and fighting off waves of the local slug and snail army all while in pouring rain to harvest some cabbage or cauliflower.  If garden-fresh tomatoes and green beans were the reward, that would be another story…

So I wanted a greenhouse. I NEEDED a greenhouse.  In early 2010, I bought one.  It was on sale at Fred Meyer and this type can be found at most big-chain stores.  It was a walk-in greenhouse, complete with shelving and plastic cover with ventilation window.  A little less than $100, it seemed perfect for a backyard gardener.  In 2010 I only had one raised bed and had just started dialysis, so was unsure how much I could even accomplish that year.  I bought it mostly to cheer me up, if nothing else, as I was doing hemodialysis at that time and it was not going well.  This was sort of a “poor me” present to myself.

greenhouse

It had some great advantages: it was easy to assemble, lightweight, and affordable.  The frame (and shelving) consisted of hollow metal rods that fit together via plastic connectors.  Once the frame was assembled is was easy enough for one person to lift and drag about the backyard, searching for the perfect spot to set it.  Then the plastic covering was tossed over and tied to the frame, shelves tucked in place, and the whole thing staked to the ground.  Easy enough.  Then came the rain…

It quickly became evident that despite having a peaked roof, the plastic covering did not shed the water as desired, but instead collected the water into pools in the four quadrants of the roof’s frame, requiring me to use a rake to push the pooled water off the roof.  The second problem was that the lightweight, easy-to-assemble hollow metal shelves could not hold much weight.  Seedling trays were about it or the frames bowed and bent.  My year-round growing space was now limited to what containers I could arrange on the ground and my hopes dashed entirely when the lightweight, easy-to-assemble metal frame collapsed from the repeated weight of the water and broke the plastic connectors as well.  This doomed greenhouse didn’t even make it to summer.  Bummer.

In the intervening years, I have added raised beds and have started the garden by sowing seeds directly outdoors or buying starts at local nurseries.  But I still wanted to be able to grow year-round.  There’s the frustrating months (Jan-March) where seed catalogs arrive, stores start displaying garden gear, but the weather is still too wet and cold to support vegetable life directly outdoors.  It’s maddening!  That has forever changed this year since my hubby and his parents pitched in and gave me an aluminum/polycarbonate greenhouse kit for my birthday!

DSCN1859

It’s 6’x8′ with 2 ventilating panels in the ceiling and a sliding door.  The panels are double-walled polycarbonate.  It was surprisingly easy to put together, although it took me about 6 hours (it says to have 1-2 helpers, but except for one part with the crown, I assembled it solo).  In true Oregon fashion, the day I finished assembly it began to rain again, but it has just slid right off the roof and out the little gutters.  My hubby and I are currently in the process of gathering the materials I need for the shelves inside (cinder blocks and 1×2 stickers).

shelves

I love listening to the tinkling rain on the roof while I’m warm and dry inside.  I’ll have a lot to learn and try out the next few seasons, but I’m anxious to achieve my year-round gardening goal and am eager to harvest vegetables in the middle of winter!   DSCN1860


And don’t worry, it won’t stay on the deck–it’s permanent home isn’t ready yet.  I need to rip out one of the raised beds and level the ground to build a frame the greenhouse will sit on.  However, Karl does enjoy the convienence of a dry, warm space mere steps from the back door.  🙂

2014 Garden

I wasn’t really planning on doing a garden this year.  Actually, what I was really hoping was that I would be doing so well after getting a new kidney last fall that I would be starting a garden as part of my triumphant recovery.  However, as I am still waiting for “the call” that did not happen.  This spring I was left with the dilemma of whether to start the garden and run the risk of abandoning it mid-season, or even worse not starting the garden and not getting the call.  The thought of sitting around all summer, waiting for a call that never comes, while staring at bare dirt where tomatoes, beans, and peppers could be growing is worse than not being around to see the end of season.

With that in mind, I began amassing my vegetable army…

Chard
DSCN1816Tomatoes (Green Zebra, Willamette, and Roma) and Peppers (Jalapenos, Banana Peppers, and Pepperoncini)DSCN1804Snow PeasDSCN1806BeetsDSCN1811Rhubarb and ArtichokeDSCN1869 Raspberries and StrawberriesDSCN1873 Herbs–chives, sage, oregano, curry, and thymeDSCN1874
ShallotsDSCN1879

PotatoesDSCN1883 White onionDSCN1884 CucumberDSCN1886 Radish, lettuce, and spinach

DSCN1887


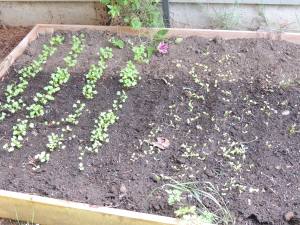
I have everything finally in the ground and except for some successive plantings of lettuce, radish, and spinach, I have everything growing that will be grown this year. Now even if I don’t get a new kidney this summer at least I have my garden!

Got Goetta?

Like a lot of people, I struggle with starting my day out with breakfast.  When I was younger, I could bolt out of the house within 30 minutes of waking up with nothing in my stomach until lunchtime, which sometimes was late in the day, if at all.  Now I have to wake up 2 hours before I need to leave for work and spend most of that time drinking tea and scrounging for food.  Cold cereal usually ends up on my breakfast menu, but in the cold winter months, a cold breakfast does not appeal.  Toast with butter stops the complaints from my stomach, but definitely does not satiate until lunchtime.  I have been searching for something quick, warm, and filling that can be prepared when I’m half-asleep.  I’m supposed to eat protein with every meal, too, but it’s difficult to meet all those requirements in a weekday breakfast.

DSCN1551  DSCN1550

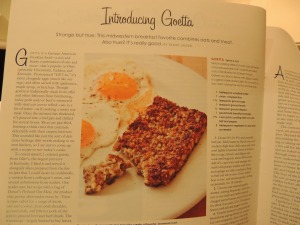
So I was understandably excited when the Jan/Feb issue of Cook’s Country arrived and there was a breakfast recipe that met all of these requirements and as an added bonus can be made and frozen down.  What is this magical breakfast dish?  Goetta.  What is Goetta?  I had absolutely no idea until I read the article.  Goetta is an odd-sounding combination of oats, meat and spices formed into a loaf, which is then sliced and pan-fried then topped with an even odder array of toppings from fried egg, ketchup, maple syrup, and even grape jelly.  I had never even heard of it (and if they hadn’t provided a phonetic pronunciation, I wouldn’t have been able to say it-it’s GET-ta, by the way).  The good people at Cook’s Country, specifically Diane Unger, who wrote the article, provided some history on this dish.  Goetta is very popular in regions with German roots, specifically Cincinnati, Ohio (where there are annual festivals dedicated to Goetta), Indiana and Kentucky.  Oats and meat are not a combination of ingredients I would have ever come up with on my own, but I like oats and I like sausage, so what was there to lose?

The recipe calls for quick-cooking steel-cut oats and I was forced to substitute Scottish oatmeal (which is a finer grind of steel-cut oats) as I couldn’t find quick-cooking steel-cut oats.  Other than that I followed the recipe exactly.  The recipe is fairly straightforward—start by sautéing onions in 1 tbsp. of butter, toast “sausage spices” of ground fennel, sage, and allspice, then add water and crumbled sausage.  Bring that mixture to a boil before adding the oats, then lower the heat and let the whole simmer until thick.  Pour the Goetta into a loaf pan and let cool before refrigerating for at least 3 hours.  Turn out the Goetta and cut the loaf into ½” slices.  Pan fry the slices in oil and top with whatever condiment sounds good.

DSCN1548

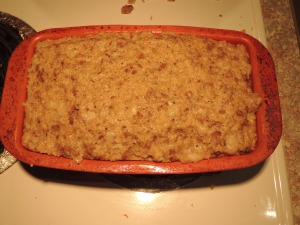
I scooped the oat/sausage mixture, which was like a paste, into a silicone bread loaf pan to make it easier to unmold.  I was a little worried that the oat substitution would alter the texture of the loaf, but it set up nicely and sliced neatly.  The only problem I encountered was that some sausage had not cooked so there were a few pink streaks as I cut the slices.  I should have let the sausage cook a little longer before adding the oats.  However, the slices are thin enough that any uncooked sausage cooked through when they were pan-fried.

DSCN1555

The final product is delicious!  Pan-frying gives the loaf slices a brown and crispy crust and the oats keep it creamy in the middle.  The added spices punch up the flavor of the sausage and it was so tasty I didn’t even need to add a topping.  The whole recipe made 16 slices, which I froze down individually and now have about 2 weeks’ worth of breakfast all ready to go!  This recipe makes me wonder what other regional dishes are out there I am unaware of and glad I have a Cook’s Country subscription!

DSCN1557

Ingredients:

1 tablespoon unsalted butter

1 onion, chopped fine

1 1/2 teaspoon ground sage

1 teaspoon ground fennel

1/4 teaspoon ground allspice

4 1/4 cups water

1 pound bulk breakfast sausage

1 3/4 cup quick-cooking steel-cut oats

2 tablespoons vegetable oil

Grease 8 1/2 x 4 1/2 inch nonstick loaf pan.  Melt butter in Dutch oven over med-high heat.  Add onion and cook until lightly browned, about 5 minutes.  Stir in sage, fennel, and allspice and cook until fragrant, about 30 seconds.  Add 4 1/4 cup water and sausage and mash with potato masher until water and sausage are fully combined.  Bring to boil and stir in oats.  Cover, reduce heat to low, and simmer gently, stirring occasionally, for 15 minutes.

Uncover and maintain gentle simmer, stirring frequently, until mixture is very thick and rubber spatula dragged across bottom of pot leaves trail for about 3 seconds, 15 to 18 minutes.  Season with salt and pepper to taste.

Transfer mixture to prepared pan.  Smooth top and tap firmly on counter.  Let cool completely, then cover with plastic wrap and refrigerate until fully chilled and firm, at least 3 hours or up to 2 days.

Run thin knife around edges of goetta, then briefly set bottom of pan in hot water to loosen goetta from pan.  Turn out goetta onto cutting board.  Cut desired number of 1/2 inch slices from loaf.  Heat oil in 12-inch nonstick skillet over med heat until shimmering.  Add up to 4 slices of goetta and cook until well browned, about 5 minutes per side.  Transfer to wire race and let drain.  Repeat as needed.  Serve.  (Wrap an remaining goetta in plastic wrap and refrigerate for up to 3 days, or slice, wrap, and freeze for up to 1 month.  To cook from frozen, reduce heat to med low and increase cook time to 7 to 9 minutes per side.)


Aebleskivers (aka Danish Pancakes)

So after an extended absence, I am back.  Had surgery, recovered, life happened and I don’t have a very good excuse for not blogging.  It’s not like I’ve stopped cooking or canning.  In fact, just tonight I made alfredo sauce from scratch, which sounds impressive unless you know how simple it really is.  However, my proudest recent accomplishment lately (well one of them, I also made chocolate truffles that I’m pretty proud of) was making aebleskivers.  In case you don’t know, aebleskivers are essentially Danish pancakes that are spherical in shape.  They require a special pan (preferably cast-iron) to make and take a bit of finesse to turn, but aren’t too difficult.

DSCN1499

Despite being of Danish and Swedish descent (my paternal grandmother was 100% Swedish and paternal grandfather was 100% Danish), I was first introduced to aebleskivers in 2008.  I went to a local Scandinavian Festival, which I quickly discovered was mostly just an excuse to pig out on Swedish meat pies, aebleskivers and other yummy treats.  Needless to say, it is my kind of festival and I haven’t missed a year since.  For $3 and usually a 30 minute wait in line, I can get 4 aebleskivers with a small side of the mythical norseberry jam (really just a mixed berry) every August.  That is not nearly often enough.

I visited my parents for Thanksgiving and one of our Black Friday stops was at the locally-owned kitchen store.  I could spend hours and hours just poking around in there, oohing and aahing over all the stuff.  To my surprise, they had not one aebleskiver pan, but 3!  And an aebleskiver cookbook!  Sold and sold!  Actually, I bought myself the pan and my mom generously bought the cookbook as an early Christmas present.  The very next morning I decided to make us all aebleskivers for breakfast.  I just used the basic batter recipe and didn’t try to fill them as I wanted to figure out how to turn them and how long they cooked before adding another level of complexity.  As it turned out, my parents didn’t have skewers, so I improvised with a knitting needle to turn them.

DSCN1497

I made some again this weekend.  I used the same basic batter again, but this time used metal skewers, although the knitting needle worked just fine, too.  Next time I make these I feel confident enough cooking them that I will break open the apple pie filling that I made earlier this fall and fill the aebleskivers with some yummy apple goodness!  They re-heat well, so I had aebleskivers this morning and some left over for tomorrow, too!  I am not sorry I bought this pan and I can’t wait to try some of the other recipes in this book.  There are recipes for savory aebleskivers (think cheese and herb!)  as well as a molten chocolate one that sounds heavenly.

DSCN1495

Preserving Peas

DSCN1102

Today it finally happened.  The peas are gone.  The bushes are now finishing their life cycle as compost.  I hate ripping things out of the garden, but after our 3rd day in a row of 90+ heat with a few more days left before it “cools off” into the 80’s, the plants were looking beat.  I picked the remaining peas as I pulled the plants out, and managed to get quite a few peas piled up, despite the dog stealing them from the bowl.  I’ve planted them for 3 years in a row now because Karl likes eating them so much.  They’re his favorite garden treat.  He’s very much a veggie lover.  Not a big fan of berries, which is good, because then there’s more for me!

This year, however, I grew them on my pole bean trellis.  Usually I just string up a short trellis on 3 foot stakes and let the bush peas crawl all over that.  I plant the same variety so I was very surprised that with the 6 foot trellis the plants grew about 5 feet tall!  There was a ton more peas, too!  Between Karl and I munching on them as I work in the garden, I’ve never before even harvested enough to do much beyond adding them to a stir-fry or two.  I quickly realized when I saw all the blossoms that I might have to find a way to preserve them this year.

DSCN1105

That’s where the FoodSaver comes in.  Have I ever mentioned how much I love this little machine?  Besides my pressure canner, it was the best food preserving investment I’ve made.   My first harvest of peas was about 4 pounds and I didn’t want them to sit overnight, so I only shelled half, and it still took me about 90 minutes to shell the other half.  Both batches were blanched in boiling water, rinsed in cold water before freezing them.  Unfortunately, the unshelled peas were too wet to get the bags to seal (kept sucking up water that was trapped in the shells) so I just rolled as much of the air out as I could and tucked the FoodSaver bag into a plastic zipper lock bag.  The shelled peas were much easier after the marathon shelling part.  They were blanched using my chinois (the only thing I could find with a small enough mesh the peas wouldn’t float out of), rinsed with cold water and left to dry for a few minutes.

DSCN1128

They shriveled a little after their hot bath, but who doesn’t?  I split them up into meal-for-two sized portions (it’ll actually be just me eating them-my husband informed me that after gorging on them as a kid and getting sick that he was done with peas) and vacuum sealed them.  Into freezer they went.  I’ve done that process three times total in the past two weeks, getting fewer peas each time, but I have 6 little bags of blanched, shelled peas and 3 bags of blanched, unshelled peas.

DSCN1130

Fresh peas are so much sweeter than store-bought frozen ones (don’t even bother with canned peas, they’re just nasty).  I usually add peas to soup, casseroles, or in a pilaf, but always with something else as they’re not that flavorful on their own, but fresh peas are special and are best when eaten on their own so their flavor shines.  I boil them in some salted water (just long enough to heat them and make them slightly tender-nobody wants mushy peas), drain them, and melt a pat of unsalted butter with them so they get a glossy sheen and eat them as a side.  Cold peas are a great addition to a green or pasta salad.

They’re the first crop I directly sow outdoors every spring and they give me hope in the wet spring to see them thriving and growing when I’m anxious to plant but the weather doesn’t cooperate yet.  I’m sad to see them go, but this year I’m bringing them back for their fall encore appearance.  Now my pole beans can finally take over the trellis and I hope to be up to my eyeballs in green beans!

Bringing Edible History to Life

I’ve been thinking about my maternal grandmother a lot since I got into canning a couple years ago.  She fed five kids (in addition to grandpa and herself, of course) for years often with little more than a hope and a prayer.  My mom was 13 (1961) before they had indoor plumbing and running water, so the conditions were labor-intensive to just get hot water, let alone hot meals.  Grandma was still cooking off her cast-iron wood stove when I was little, although there was now a gas line that made things easier.  While there were countless chores, income was scarce and had to stretch to fill the needs of a family of 7.  Grandma always had a garden, and most years she canned food to make it last through the winter.  The nearest supermarket was 20 miles and a mountain pass away, and with only 1 car, which she couldn’t drive anyway, trips to town weren’t something that happened with regular occurrence.

When I was little, she still had her garden every year, but she didn’t can much at that point with all her children grown.  I was 17 when she died and there have been numerous times since that I wish I could still ask her advice, listen to her stories, and just take the time to appreciate her like I don’t think I did when I was a teenager.

A few months ago I went through all my cookbooks and came across an old cookbook printed on mimeographed paper from typewritten pages.  This was pre-computer, pre-photocopier type stuff.  It was made of recipes collected from the local grange where I grew up.  All the recipes were attributed to the (mostly) women who submitted them.  There were names I hadn’t thought of in years, and to my surprise, even my mom and Grandma.  Grandma had an oatmeal raisin cookie and a Crisco frosting.  The oatmeal raisin cookie recipe has been passed down in our family for four generations.  I got it on my wedding day from my Aunt.  My mom had a rhubarb cake recipe she never remembers making and thinks she probably copied it out of a magazine.

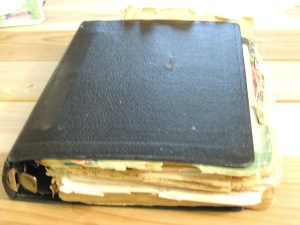
That find got me wondering if Grandma had a recipe book or cookbooks and what happened to them if she did.  Yesterday, I got my answer.  My mom was up for a visit and she gave me an old 3-ring binder with two spiral-bound cookbooks (though most of the plastic spirals are gone) interspersed with handwritten recipes and newspaper clippings, all of which have yellowed with age.  A lot of the newspaper clippings are from the early 60’s, which I now realize coincides with when Grandma got electricity and explains why a lot of those clipped were cookies and cakes.  She could now cook such “frivolous” treats as desserts much easier with electricity! My aunt was also there, and she had brought (all the way from North Carolina) Grandma’s apron that she wore when cooking or canning to give to me.  I feel much closer to my Grandma now that I can cook from her saved recipes while wearing her apron.  She’ll be with me, in some way, whenever I’m in the kitchen.

DSCN1146

The earliest newspaper clipping I found was from 1939 and in addition to a movie ad for an Errol Flynn movie, contained recipes for a jam spice cake and a noodle ring, which I still can’t quite figure out what it is.

DSCN1154

DSCN1157

One newspaper printed such culinary jewels as pig’s feet jelly.  I’m sure pig’s feet were more abundant and our current “nose-to-tail” trend was more of a necessity than novelty in those times. I must admit, though, I am curious about the recipe.  I imagine it would be great for sauces, stews, or gravy.

DSCN1158

What makes this book priceless to me is to see my Grandma’s (and even my two great-grandma’s!) handwritten recipes.  It’s like getting a piece of her back and getting to work with her in the kitchen, which is what I really long to be able to do.  I woke up too early this morning, but as I lay there debating whether or not to go back to sleep, I remembered seeing a waffle recipe in the book and decided there was plenty of time for waffles.

DSCN1135

I dug it out and pinned it to the refrigerator so I couldn’t spill something on it and got to work.  I had everything on hand and, while the waffle iron heated, I was able to whip up the batter in just a few minutes.

DSCN1138

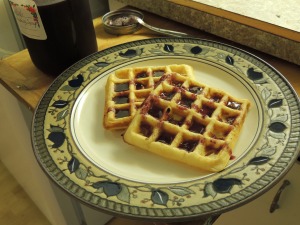
In no time at all I had a beautiful batch of waffles and topped them off with blueberry syrup I made last year.  The recipe may have been labeled “Plain Waffles,” yet they were anything but for me.  There were rich-tasting with a hint of crunch on the outside and warm and fluffy on the inside.  The syrup pooled in the waffle wells and soaked into the waffle, making each bite taste of warm, sweet blueberries.  I think Grandma would have approved!

DSCN1140

How Does Your Garden Grow?

This weekend the weather has turned from spring to summer.  At last check, the temperature was 85 outside and too hot to work in the sun more than 30 minutes or so at a time.  Not sure if I should be worried that I haven’t quite got the garden beds ready to plant, or be leary of the warmth, as it usually doesn’t stay warm until late May/early June. For now I’m going to just enjoy the sunshine and share pics of my progress in the garden so far.

DSCN0866

Rosemary, thyme, and oregano.  Third year in a row it’s come back although the rosemary is getting crowded out by the thyme. DSCN0867New garden bed! This will be where the squashes go! DSCN0861

Spring bulbs fading, summer bulbs going strong in the backyard. DSCN0854

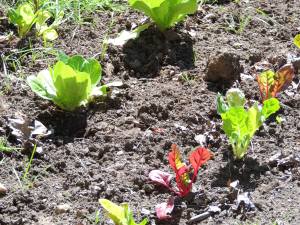
Swiss chard and romaine lettuce. DSCN0855

Trying the potato bags again this year, but if they perform like they did last year I’m going to bag whole idea (pun intended!) and just plant them in the ground.DSCN0856

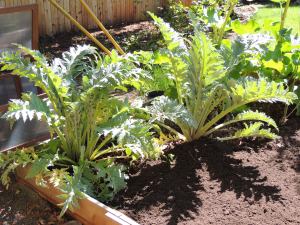
Artichokes. DSCN0857

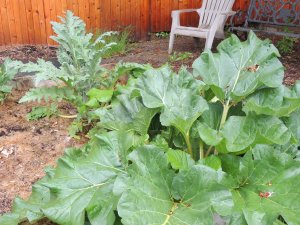
I had no idea rhubarb flowered on such giant stalks.  These are 6 and 8 feet tall! DSCN0853

Peas and trellis.  Pole beans will replace the peas and cover the trellis. DSCN0852

Close-up of peas. DSCN0851

Strawberry blossoms and one onion coming back 3 years after I tried growing them there.  The strawberries have taken over the whole bed now!  I can’t wait to make jam! DSCN0850

The berry bed-raspberries and strawberries. DSCN0843

The raised herb garden.  Chives, thyme, sage, parsley, and garlic. DSCN0859

“Angel Face” rose bloom-planted in memory of my late cat, Lizzie.

The Easiest Homemade Bread in the World

I was watching an old episode of Alton Brown’s show Good Eats awhile back and it was all about baking with your barbeque.  He made three different breads with nothing more than a dutch oven and a charcoal grill.  He didn’t even use a grill-it was a metal surface he threw hot briquettes on and put the dutch oven directly on the coals.  It was like watching MacGyver bake.  Thankfully, he did have instructions for using a traditional oven.  I have nothing against charcoal, but I love the smell of baking bread filling the house not the backyard.

102_2755

Alton’s recipe for Knead-Not Sourdough is just 4 ingredients-flour, yeast, and water.  Take 17.5 ounces of flour, 1/4 teaspoon yeast, 2 1/2 teaspoons kosher salt, and 12 ounces of water and mix in a bowl until no flour streaks remain.  Cover the bowl with plastic wrap and let sit for 19 hours.  Take the dough out of the bowl and punch down and turn it over onto itself couple times.  Cover with a towel and let rest for 15 min.  Shape into a ball and let sit (under the towel) for 2-3 hours or until it’s doubled in size.  Meanwhile, heat a dutch oven in a 450 degree oven for at least an hour.  When the dough ball has doubled, carefully place it into the pre-heated dutch oven, cover and let bake for 30 min.  After 30 min, uncover and bake until internal temperature is 210-212 degrees.  Allow to cool on a cooling rack for at least 15 minutes before serving.

I have made this recipe several times and it is delicious!  Even with just the two of us we eat the whole loaf within a day.  It has a crisp crust, with a chewy crumb inside-just the way I like it.  It’s best still warm and tastes yummy without any toppings but is best with a thin layer of butter melted into its nooks and crannies.

100_2445

The hardest part of this recipe in my house is finding a room that stays above 70 degrees overnight in the winter months.  It usually sits on my desk in my bedroom all night, and I do love that fresh bread (aka: yeast) smell first thing in the morning.

Some people think bread-making is a mysterious art that only experienced bakers can do successfully or that a home cook needs a bread machine to make good bread, but really yeast and time does all the work for you in this recipe and anyone could make this bread.  If you don’t have a dutch oven, you can shape the dough into 2 loaves and bake in a loaf pan just as easily.  Or if you didn’t have a loaf pan, either, an inverted baking sheet works as an improvised baking stone.  Pre-heat as you would the dutch oven and bake the free-form loaf on parchment paper on top of the inverted baking sheet.  If the shape comes out a little funny, just call it artisanal bread.  😉  Whatever it looks like, homemade bread tastes far superior and is much cheaper than any store-bought bread!

FoodSaver Fun


My usual Sunday morning routine is to turn the TV to QVC as I make a late breakfast of pancakes and eggs or pan-fried sliced potatoes and a fried egg (as long as there’s tons of carbs!).  From 9am-12pm here on the west coast In the Kitchen with David is on and I enjoy watching him pitch the countless kitchen gadgets I don’t know how I lived this long without owning.  I am not always immune to David Venable’s selling powers, however, and that was evident a few weeks ago when he had this FoodSaver on.

DSCN0822

But wait! There’s more! It came with 2 rolls of customizable bags, 2 wine stoppers, quart bags, and gallon bags!  Now on EasyPay with free shipping!  The feature that pushed it over the edge was the fact that I’ve never seen it in red before (and my kitchen appliances are mostly red) and I’ve coveted one of these for at least a year.  It also has a vacuum hose attachment that for $10 at Bi-Mart I bought a jar sealer attachment so I can vacuum pack mason jars.  Brilliant!

DSCN0833

One of my biggest kitchen peeves is that I never seem to go through lettuce fast enough before it turns to gelatinous goo.  We do eat salads fairly often, but I’m often undone by my desire to get a good deal and buy the larger amount because it’s a better value, so the greens often decompose faster than our consumption rate.  However, just like the FoodSaver commercials say, “air is the enemy of freshness” and what better way to prolong the life of lettuce than by vacuum packing?

DSCN0825

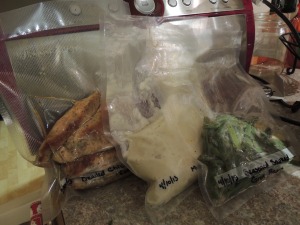
The arrival of the FoodSaver came at a great time, too.  My aunt and uncle moved from out-of-state to about an hour away from me and just 2 weeks later my aunt broke her ankle.  She broke both lower leg bones, requiring 2 surgeries and will have to be off of it for almost 6 months.  I decided to help the best way I knew how, by cooking.  I made some dinners-baked ziti, chicken divan, shepherd’s pie, vegetable beef stew, chicken cutlets, mashed potatoes, green beans, and a rhubarb pudding cake-and sealed everything up with the FoodSaver and froze them all down.

DSCN0829DSCN0824I bought the foil containers at the dollar store, which came with lids and 3 or 4 to a package.  The FoodSaver couldn’t be more simple to use.  It comes ready to go right out of the box, all I had to do was plug it in.  The quart and gallon bags just slipped into the bag feed and the FoodSaver automatically vacuum-packed the bag and sealed the end.  It took me longer to find a sharpie to write on the bags than it did to vacuum and seal them all up!  The jar sealer attachment was equally simple.  The instructions say to leave a 1″ headspace, place the jar attachment over the lid and attach the hose.  Press a button and it sucks all the air out of the jar, sealing the lid.  So far, my lettuce greens have been vacuum-packed for 8 days and are still good-no lettuce goo in sight.  I take a sealed jar of greens to work and another container of toppings and have an instant salad for lunch.

I can tell this handy little machine is going to be put to the test when the garden starts producing in earnest!  The FoodSaver was by far the best purchase David Venable has persuaded me to buy!


Home Canned Dried Beans

I used to think beans were gross.  I refused to eat chili or any soup or stew featuring any sort of bean and would only eat them if they were thoroughly disguised in a dish like in a Mexican filling.  In high school, I worked at a Taco Bell and would never eat even their refried beans (I also wouldn’t eat their meat after I started working there, too, but for different reasons).  However, like mushrooms, I found out that I do like them.  I like to think my palate is becoming more sophisticated but I have a feeling it has more to do with the fact that my mom didn’t like beans and so growing up we just didn’t eat them.  Ever.  She didn’t like Mexican food, either, so even refried beans were a culinary mystery.  In fact, Taco Bell was my first introduction to cooking beans, if you call mixing scalding hot water with dehydrated beans cooking.  It took about 2 years of working there to get up the courage to eat the refried beans-in a 7-layer burrito, easy beans, extra rice, no guacamole.  Not bad, but I couldn’t see making them at home.

I must confess that even now, bean-based soups and stews are not in my cooking repertoire but beans do make it on the menu.  One of my favorite places to go for lunch at work is to the local Mexican fast food (not Taco Bell) and eat their bean and cheese burrito.  They have the best beans, tortillas, and spicy red sauce-it comes with a handful of chips and a drink and the best part the whole things is only $4.  I love good food at even better prices.

Most of the time, however, I have homemade enchiladas in my freezer that I take to work with me and just re-heat for lunch.  I was first introduced to these enchiladas by my husband when we were still dating.  The first meal he served me was an enchilada that his father (who is a great cook) had made.  I thought they were a frozen dinner of some kind and was astonished that something so good could be made at home, froze, re-heated and still taste so good!  I got his dad to show me how to make the enchiladas myself (although mine don’t taste quite as good as his) and now I make up 2 dozen at a time to have on hand for a quick lunch.  All that burrito-folding experience at Taco Bell is finally paying off!

So what does all this have to do with canning?  This is a canning blog after all.  Well, I’ll tell you.  Commercially canned beans have a lot of salt in them (I know, because a kidney-friendly diet also means a low-salt diet).  There are low-salt versions, but my thrifty nature loathes the thought of spending almost a dollar per can of beans, when I buy dried beans in bulk for way less than a dollar per pound.  However, beans take a long time to cook and I’ve found are best only after an overnight soak.  This requires advanced planning, which I am usually incapable of on a weeknight.  If I can cooked beans myself, I’ll have beans on hand at a moments notice and for a fraction of the price of the commercially canned stuff without all that pesky salt.

Canned Turtle (Black) Beans

1 Pound Dried Beans (any type of  dried bean)

4 Quarts Water

3 Tbsp Salt (optional)

The night before you plan on canning them, dissolve 3 tbsp of salt per gallon of water for every pound of beans.  Add beans and soak at room temperature for 18-24 hours.  The brine is to make the bean skins more porous and the insides of the beans will have a creamier texture, but a salt-less soak will work, too.  The next day, drain and rinse the beans (the overnight soak will also help get rid of some of the gasiness that beans are prone to produce).  Put beans in large stock pot and cover with 2″ of water.

Boil for 30 minutes.  While they’re boiling away, get the pressure canner going and sterilize jars (I used pint jars to approximate a can of beans, but use whatever size fits your needs).  Simmer lids and rings in a separate pot.  When beans are done, fill jars with beans and cooking water, leaving 1″ headspace (I needed a little extra hot water to fill jars as I had a bit of a boil-over).  I put on the lids and rings when the jars were filled and rims wiped, then placed in the pressure canner and processed for 75 minutes (for pints-90 minutes for quarts) at 10 pounds pressure.

DSCN0659

Voila!  Cooked beans ready to go whenever I am!

DSCN0662